

I don’t cover my raised beds with plastic in winter unless I’m facing a sudden hard freeze below 15°F or trying to overwinter a specific crop like spinach.
Most of the time, I skip plastic because it traps moisture, invites rot, and suffocates soil life.
Instead, I remove all dead plants and weeds first, then spread 2–3 inches of straw or chopped leaves for insulation.
If I do use plastic, I build a simple PVC frame with 6-mil clear sheeting and leave gaps for airflow.
This balanced approach protects plants without creating the soggy, anaerobic conditions that tight plastic causes.
You can decide which route fits your situation based on your local climate and crop needs.
Does Your Raised Bed Actually Need a Winter Cover?
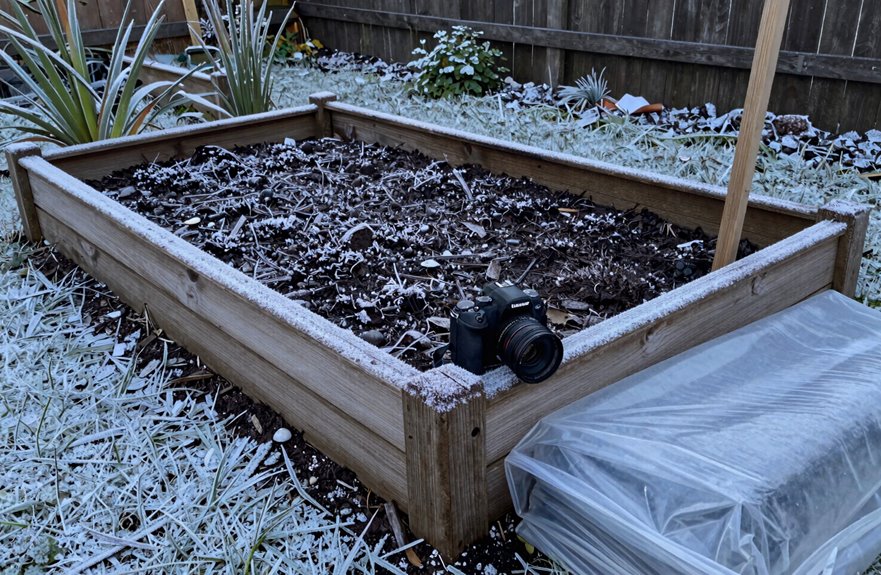
When I first started gardening, I assumed my raised beds needed plastic covers to survive winter, just like wrapping a leftover sandwich. I was wrong.
What I’ve learned:
- Plastic traps moisture and invites rot. Your soil needs to breathe.
- I spread 3 inches of mulch, such as straw, shredded leaves, or wood chips. This insulates roots, feeds soil life, and blocks weeds.
- For tender perennials, I use frost covers. These breathable fabrics protect plants without suffocating them.
- Cover crops like clover or winter rye work well. They prevent erosion and add nutrients.
The goal isn’t sealing your bed shut; it’s preparing it to rest well. You’ll join thousands of gardeners who’ve ditched the plastic and found healthier springs waiting for them.
Clean Your Beds First: Whether You Cover or Not
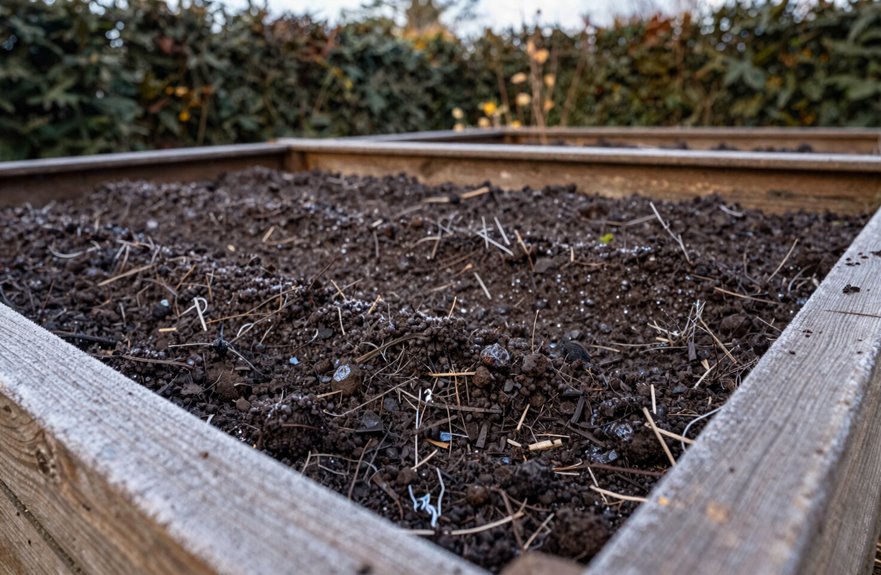
Starting with a clean slate, I pull out every last tomato vine and bean stalk before I even think about winter protection. I remove all annual vegetables and dead plant material first. This prevents diseases from overwintering and lets me inspect my soil properly.
I distinguish carefully between annuals, which must go, and perennials, which can stay with some protection. I clear every stick and fallen leaf to minimize pests and weed seeds that want shelter. I pull weeds everywhere I spot them. Those seeds survive winter and sprout come spring.
After cleanup, I inspect for clover, purslane, and chickweed to plan my attack. Then I decide: bare soil or cover crops. Either way, I start clean.
What Winter Plastic Covers Actually Do
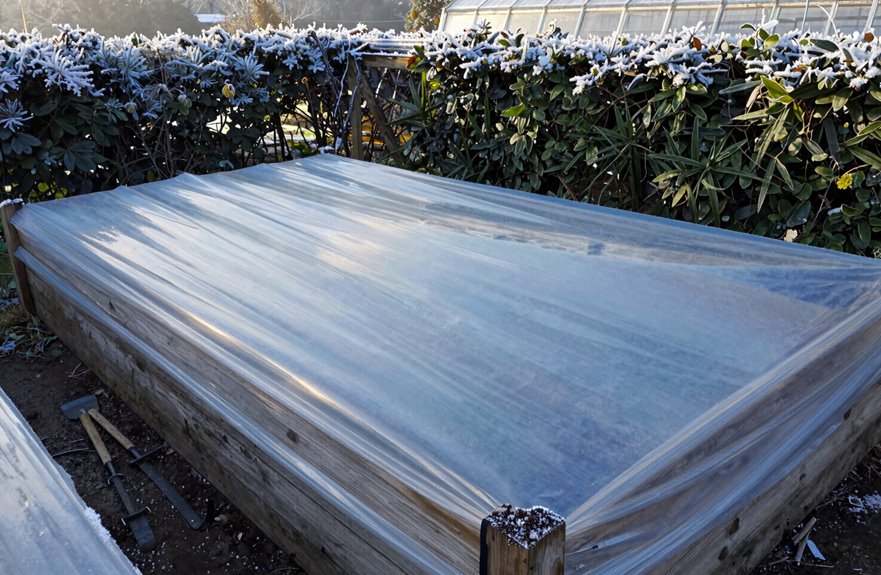
Why would I even think about stretching plastic over my beds when winter hits? Plastic winter covers mainly trap moisture and block precipitation, which sounds helpful but creates problems I don’t want.
Here’s what actually happens:
- Plastic prevents rain and snow from reaching my soil, so beds dry out unevenly come spring.
- It traps humid air underneath, encouraging mold and fungal issues I’d rather avoid.
- Temperature swings become more extreme; hotter on sunny days, colder at night, stressing any plants I’ve left.
- Soil life, those beneficial organisms I’ve nurtured, gets cut off from natural cycles.
Better winter covers include 2-4 inches of straw mulch, chopped leaves, or breathable frost fabric. These protect raised beds while letting moisture through and keeping soil biology active. Gardeners who skip plastic in favor of materials that work with nature see measurable improvements in spring soil health and reduced disease pressure.
Why Tight Plastic Covers Backfire
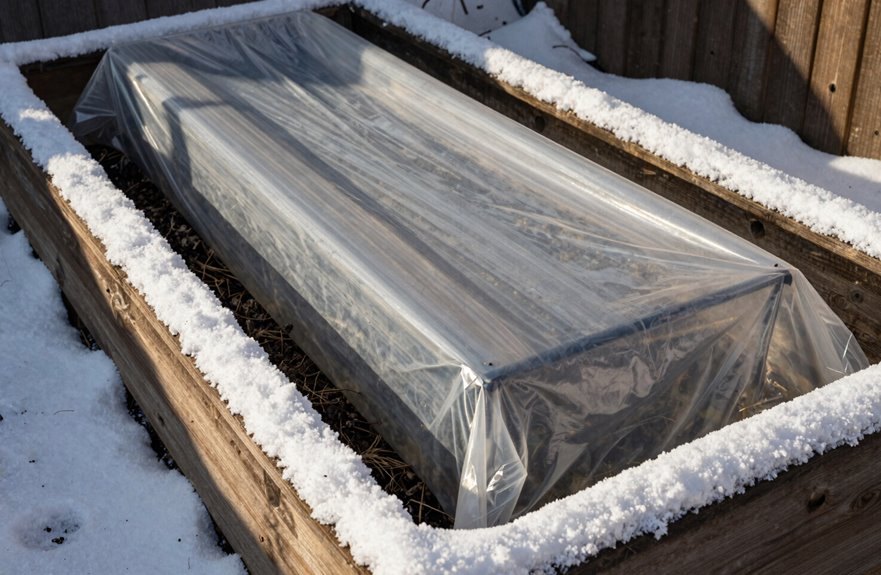
I’ve learned the hard way that wrapping my raised beds too snugly in plastic creates more headaches than protection. When I stretch that sheeting taut across the frame, I’m accidentally sealing in moisture that can’t escape, suffocating the soil’s natural breath, and setting up my plants for wild temperature swings between night and day. Let me walk you through exactly why each of these problems develops, and what I now use instead.
Trapped Moisture Problems
Tight plastic covers can quickly turn into a moisture trap you didn’t bargain for. When I stretch plastic tightly over my raised beds, I’ve learned that I’m essentially creating a greenhouse for problems, not plants.
Here’s what I’ve observed comparing cover types in my own garden:
| Cover Type | Moisture Risk Level | Air Exchange Quality |
|---|---|---|
| Tight plastic | High trapped moisture | Poor—sealed environment |
| Loose plastic | Moderate risk | Limited but some airflow |
| Breathable row cover | Low risk | Good—allows ventilation |
| Straw mulch | Minimal risk | Excellent natural exchange |
| No cover | Natural evaporation | Full air circulation |
Trapped moisture under plastic covers builds condensation that keeps soil soggy for weeks. This humidity invites fungal diseases and creates anaerobic pockets where beneficial microbes struggle. I’ve switched to breathable alternatives. My soil stays healthier, and fungal rot no longer develops in my beds.
Root Suffocation Risks
Beyond moisture problems, I discovered another hidden cost of wrapping my beds too snugly: my plants’ roots couldn’t breathe. When I stretched winter plastic tight across my raised beds, I unknowingly sealed off the soil’s natural air channels. The result was root suffocation that stressed my overwintering kale and garlic before spring even arrived.
What happens beneath that seemingly protective layer involves three key mechanisms. First, plastic sheeting blocks gas exchange between soil and atmosphere. Second, trapped carbon dioxide builds up around root zones while oxygen levels drop. Third, condensation creates anaerobic pockets where beneficial microbes suffocate and die. I noticed my soil smelled sour when I finally peeled back the cover in March.
My perennials emerged sluggish and pale that year. Now I skip tight plastic entirely, choosing instead breathable straw mulch or horticultural fleece that insulates without strangling. Soil microbes require oxygen to function, just as plant roots do.
Temperature Fluctuation Damage
How did my kale survive frozen nights only to wilt on a sunny January afternoon? I learned the hard way that tight plastic covers create a greenhouse trap.
Here’s what happens: 1) Sunshine hits your covered bed and temperatures inside spike 20-30 degrees higher than outside. 2) Your plants break dormancy, drawing water up. 3) Night falls, plastic turns cold in minutes, and that same foliage flash-freezes. The tissue collapses.
Tight plastic also blocks air movement, creating frost pockets along bed edges where cold air pools and burns margins. Condensation drips constantly underneath, keeping crowns wet for weeks.
You’re suffocating your soil while cooking your plants. Breathable row cover fabric or a simple cold frame provides steady protection without these temperature swings.
When a Plastic Winter Cover Makes Sense
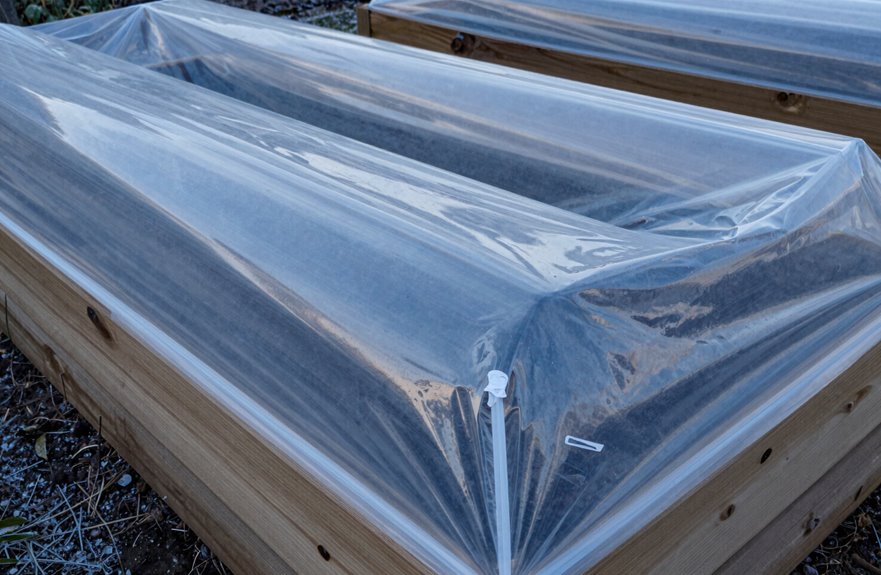
Plastic winter covers work in three specific situations: early frost protection, smothering persistent weeds, and buffering delicate warm-season setups. Understanding when to use plastic and when to skip it keeps your beds healthier in the long run.
When to Use Plastic
Where exactly does plastic fit into your winter garden plan? It’s a last resort, not a first choice. I reach for mulch or a frost blanket before I ever consider unrolling polyethylene.
Plastic makes sense in just two scenarios. First, when a sudden polar vortex drops temperatures below 15°F and my soil crust threatens to heave tender roots. Second, when I’m forcing an early crop of spinach or winter lettuce in February and need a temporary greenhouse effect.
My method: I build a simple PVC frame, 18 inches tall, and drape 6-mil clear sheeting over it. I secure the edges with bricks, but I leave gaps for airflow. I monitor daily. At 40°F, I peel it back. After three days above freezing, I remove it entirely.
Most winters, my beds stay bare beneath compost and straw. Plastic is a tool, not a lifestyle.
Weed Control Applications
The quiet months give me a chance to outsmart next spring’s weeds, and plastic has its place in that fight.
- First, I pull every weed I can find in fall, roots and all. This removes the competition before it spreads.
- Then I choose my weapon. I’ll lay cardboard or black plastic directly over bare soil. This blocks light and stops weed seeds from waking up.
- I plant cover crops like winter rye or crimson clover. They crowd out weeds, protect my soil, and add organic matter when I turn them under in spring.
- Around my garlic and overwintering greens, I keep mulching with 3-4 inches of chopped leaves or straw. This insulates roots, feeds soil life, and prevents weeds from gaining ground.
Plastic works here, but I’m building my soil community for long-term productivity.
Warm-Season Protection
When my pepper and tomato beds finally empty out in late autumn, I’m faced with a choice: seal them up tight or let them breathe through winter. I’ve learned plastic isn’t my go-to for warm-season beds. Instead, I rely on simpler methods that keep my soil healthy and ready for spring.
- I spread 3-4 inches of straw mulch over bare soil to insulate roots and feed microbes
- I pull every dead plant and weed to stop disease from overwintering
- I use frost cover or low tunnels only when I’m extending the season for hardy crops like kale
- I skip the plastic sheet unless I’m building a proper hoop house with ventilation
Plastic winter covers trap too much moisture and heat for empty beds. Mulch allows soil to rest and maintain microbial activity naturally until planting time returns.
Use Plastic Correctly: 4 Rules That Matter
Why cover your raised beds at all? I skip plastic most winters. If you’re set on using it, here’s how to avoid the common mistakes that hurt more than help.
I’ve questioned the need for plastic winter covers for years—most seasons, I simply skip them.
- Choose the right material. I use white or black plastic, never clear. Clear plastic traps too much heat and cooks your soil on sunny days.
- Master airflow management. I leave the ends open or punch holes every 12 inches. Stagnant air breeds mold and rot.
- Ventilate during warm spells. When temperatures hit 50°F, I peel back the plastic or prop it up. This prevents overheating and fungal growth.
- Prep beds properly first. I clean debris, add 2-3 inches of mulch, and plant cover crops like crimson clover. These steps build soil health, making plastic optional rather than essential.
Skip Plastic? Try Row Covers and Garden Fabric
I’ve moved away from plastic entirely. Instead, I now use breathable row covers and garden fabric, which let my kale and carrots survive frost while cutting down on mold problems. My beds are prepped in fall, and spring cleanup feels easier every year.
Eco-Friendly Alternatives Exist
How much unnecessary plastic am I really willing to add to my garden? I’ve found that row covers and garden fabric give me everything I need without the waste.
Row covers let light and moisture through while shielding my cold-hardy greens from frost. Garden fabric keeps soil warmer than bare ground, often by 4-8 degrees. I can lift either material easily to harvest spinach or check soil moisture. Both options break down eventually, or I store them for years of reuse.
I secure my covers with U-shaped pins or smooth rocks every 18 inches. For beds over 4 feet wide, I use hoops to prevent sagging. When spring arrives, I simply roll them up and my soil wakes up healthy, alive, and ready. No plastic fragments remain behind.
Fall Prep Steps
Where do I start when the leaves begin to turn? I clean house first. I pull every annual, weed, and dead plant from my beds without exception. Debris invites pests and disease, and I’m not giving them winter shelter.
Next, I lay down 2-3 inches of chopped leaves or straw mulch. This insulates my soil and keeps weeds dormant. Then comes my winter protection: I drape row covers or garden fabric over hoops or stakes, securing the edges with rocks or soil. Row covers let my kale and carrots breathe while blocking frost. I’ve harvested carrots in December this way.
Unlike plastic, fabric won’t trap moisture or crumble into microplastics. It insulates, deters pests, and stabilizes temperature. Mulch and fabric together create a system that reduces pest pressure, maintains soil warmth, and extends the growing season.
Spring Readiness Benefits
When spring finally arrives, you’ll thank yourself for skipping the plastic. My raised beds thaw faster without that solid barrier, letting me plant weeks earlier. Row covers and garden fabric give me the frost protection I need without the environmental guilt.
To prepare now:
- Clear debris in November, then till once soil drops to 50°F
- Layer 2-3 inches of composted manure before the first hard freeze
- Sow winter rye or crimson clover by mid-October
- Stock heavy-duty frost blankets (1.5 oz per square yard) for February deployment
Come March, I’m solarizing two beds for pest control while planting early garlic in the others. No plastic cleanup, no frantic spring scrambling. Warm, workable soil means faster germination and stronger seedling growth from day one.
Mulch or Plastic? Match Your Cover to Your Climate
Why choose one cover over another? First, I match my covers to my climate. In mild zones, I spread 2 inches of straw or chopped leaves as mulch and leave beds open to catch rain. Next, in colder areas, I pile mulch 4 inches deep and add frost covers instead of plastic to stop damaging freeze-thaw cycles. Plastic blocks air and traps moisture, so I don’t use it for winter protection.
| Climate | My Cover Choice |
|---|---|
| Mild winters | 2-inch mulch, open beds |
| Cold winters | 4-inch mulch, frost covers |
| Pest issues | Summer solarization, then manure |
If I solarize, I add manure after to restore beneficial microbes. This method keeps my soil healthy and ready for spring. Climate-smart covers matched to your regional conditions will protect your beds effectively.
Keep Perennials Healthy Without Trapped Moisture
How do I keep my perennial herbs and vegetables alive through winter without creating problems? I skip the plastic sheeting entirely. Plastic traps moisture against stems and roots, and that dampness invites rot. Instead, I reach for breathable options that protect without suffocating my plants.
My approach for fellow growers:
Tuck frost covers over hardy herbs when hard freezes threaten, then pull them back only when snow melts to harvest and breathe.
- I tuck frost covers over sage, chives, thyme, and oregano when hard freezes threaten, extending my harvest without sealing in humidity
- I apply 2-3 inches of straw mulch around Jerusalem artichokes and asparagus crowns after the first hard frost, insulating roots while letting soil breathe
- I pull back covers only when snow melts, harvesting what I need, then replace them loosely
- I remove any accidental plastic immediately. Perennials need airflow, not a greenhouse effect
My plants wake healthy in spring.
Your Local Weather Should Choose Your Winter Cover
I’ve learned that what works in my garden won’t work everywhere. Your local weather should choose your winter cover, not a one-size-fits-all approach.
Here’s how I match protection to conditions:
- Check your frost dates. Mark your area’s typical hard freeze window on the calendar. Apply your winter cover just before, not months early.
- Gauge your severity. Mild winters need just 2-3 inches of straw or leaves. Use frost blankets for moderate cold. Brutal, windy zones demand thicker mulch plus wind barriers.
- Watch your moisture. Heavy snow regions need breathable covers so soil doesn’t stay soggy. Dry, cold areas need covers that block desiccating wind.
- Consider sun exposure. Transparent covers warm soil too much in sunny southern winters, but help in cloudy northern ones.
Match your cover to your reality, and your plants will survive winter without unnecessary damage.
What You’ll Find When You Remove Winter Covers
When do I finally pull back those winter covers? I wait until frost risk drops and soil starts warming, usually late winter or early spring. Then I get to see what my raised beds have been hiding.
I wait until frost risk drops and soil starts warming—usually late winter or early spring—to finally see what my raised beds have been hiding.
Every time I uncover them, I find:
- Soil that’s either crumbly or compacted, showing if moisture stayed balanced or pooled underneath
- Mulch that’s faded, thinned to one inch or less, or shifted to bare corners
- Moss, algae, or frost-heaved clumps signaling where cold air sneaked in
- Dormant crowns and overwintering crops finally visible, ready for pruning
I check drainage spots, feel for warmth four inches down, and note where compost needs topping up. Those winter covers protected my beds, but lifting them reveals what actually happened beneath. I can then address drainage problems, assess soil temperature, and add compost where needed before planting begins.
Choose Your Winter Cover in 3 Steps
Where do I even begin with winter prep? Breaking it down into simple steps makes the process manageable.
First, I clear my beds completely. I pull out dead annuals and every weed I can find, because leftover debris invites pests and disease.
Second, I add my protective layer. I spread mulch three inches deep. Straw, shredded leaves, or compost work well. This insulates my soil, keeps weeds down, and lets water soak through.
Third, I decide between resting my soil or growing through winter. Sometimes I plant cover crops like winter rye or clover; they hold my soil in place and add nutrients come spring. Other times I use breathable row covers or simple hoop tunnels instead.
Choose what fits your climate. Your garden will respond to consistent preparation.
No Cover at All: The Mulch-Only Method
Why complicate winter protection when mulch alone gets the job done? I’ve learned that sometimes the simplest approach builds the strongest soil community.
Sometimes the simplest approach builds the strongest soil community.
For my raised beds, I skip the plastic entirely. I spread a thick layer of mulch, about 3 inches of chopped fall leaves or straw, right over bare soil. This insulates, suppresses weeds, and feeds the earth gradually.
This method works through these steps:
- I clean out old plants and pull weeds first, so nothing unwanted hides beneath
- I add compost or manure to replenish nutrients before mulching
- I let natural microbial life thrive, preserving beneficial organisms plastic would harm
- I watch erosion stop and spring preparation begin, with soil ready for early planting
This straightforward practice keeps my raised beds healthy, low-maintenance, and ready for the season ahead.





