
I keep my outdoor plants warm in winter through three proven steps. First, I check each plant’s cold tolerance. Woody shrubs handle freezing, but tender perennials need protection.
Second, I move vulnerable potted plants indoors before the first frost hits 33–36°F, placing them near bright windows away from heating vents.
Third, I cluster remaining containers against south-facing walls and wrap root zones with bubble wrap or burlap, adding 3–4 inches of mulch to trap ground warmth. When nights drop to the low 20s, I prop individual covers with sticks so foliage stays untouched.
Cold frames, mini greenhouses, and dormancy care can further improve winter garden survival rates.
Check Plant Cold Tolerance for Winter Survival
Why do some plants sail through winter while others turn to mush after one cold night? Most outdoor plants handle winter fine when temperatures stay above 40°F, but tender ones need it above 50°F. When frost threatens near 32°F, check your plants’ cold tolerance first.
Here’s my method:
- Identify perennials and woody shrubs, which tolerate freezing with little damage.
- Flag non-woody, non-perennial plants as frost protection priorities.
- Watch for National Weather Service advisories at 33–36°F, since frost forms on leaves even when air feels slightly warmer.
- Remember that radiation freezes hit on clear, calm nights, while advection freezes bring wind. Both damage vulnerable tissues.
Understanding your plants’ cold tolerance determines which ones need protection.
Move Potted Plants Indoors Before Frost
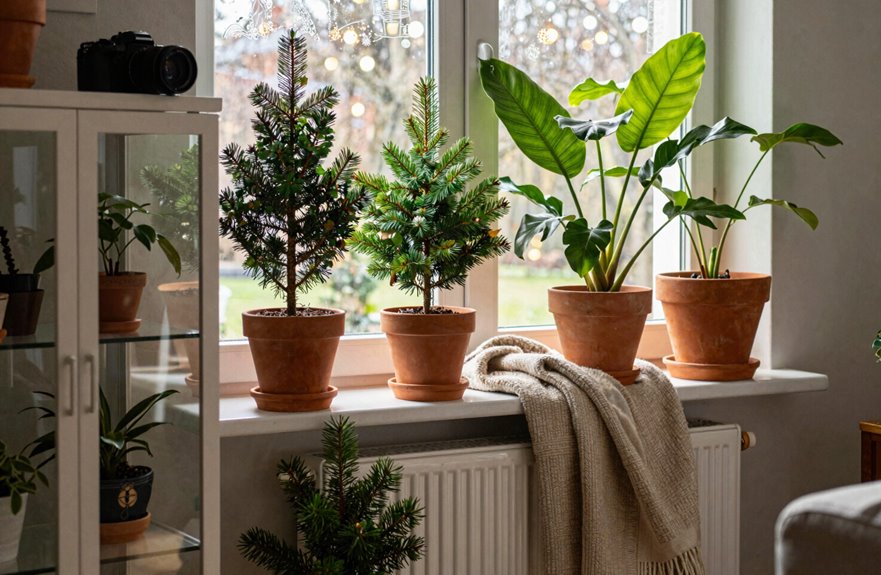
I like to move my potted plants indoors before the first frost warning hits, and timing really matters. I keep my eye on weather forecasts, and when nighttime lows approach 32°F (0°C), I grab my hanging baskets and containers before temperatures crash. Once inside, I place them near bright windows in my home, garage, or enclosed porch. They need to stay clear of heating vents and cold drafts while getting enough light to stay healthy.
Ideal Indoor Locations
Protection from frost starts with timing and the right space. Move potted plants to indoor locations that stay above freezing, far from vents and cold drafts. Heated rooms work best, but enclosed porches and garages with limited airflow serve as solid backup spots when temperatures drop suddenly.
Effective indoor locations for frost protection include:
- Heated living spaces away from direct vents
- Enclosed porches with steady temperatures
- Insulated garages with minimal cold air leaks
- Bright window sills avoiding drafty glass
- Interior rooms maintaining 40°F or warmer
Hanging baskets and containers relocate easily, so prioritize moving them first. Leave new garden bed sprouts alone and move only established potted specimens. Steady warmth prevents the stress that comes from dramatic temperature swings.
Timing the Move
Once you’ve found the right spot indoors, you need to decide exactly when to make the move. Check the forecast and move indoors before that first frost hits. Freezing temperatures can damage roots and leaves overnight.
Here’s my simple plan:
- Watch the weather. When nighttime lows drop to 35°F, start relocating. Hang baskets and container gardens move first since they’re lightweight. Leave garden bed plants in place; they’re tougher than they look.
- Create backup shelter. If you can’t move indoors, use an enclosed porch. Add a small space heater and plastic sheeting when temperatures hit the low 20s. Remove coverings during warm days to prevent overheating.
- Store supplies. Save your wraps and tarps year after year. There’s no need to keep buying new ones.
Timing matters. Beat the freeze, and your plants will survive the winter.
Protecting Vulnerable Growth
Where do your most fragile plants go when a freeze is coming. I bring mine inside, and you should too.
- Bring hanging baskets and container gardens indoors first. They’re the easiest to move
- Place plants in your home, garage, or enclosed porch, away from heating vents
- Use frost-proof cloth or a small space heater on enclosed porches for extra warmth
- Build cold frames for plants that need gradual transition to indoor conditions
- Save your sheets, frost-proof cloth, and plastic covers for reuse each season
I keep my cold frames ready for plants that can’t handle sudden temperature swings. New sprouts in garden beds stay put; digging them up causes more harm than frost. With proper planning, you protect the plants you’ve invested time and resources growing.
Group Outdoor Containers to Share Warmth
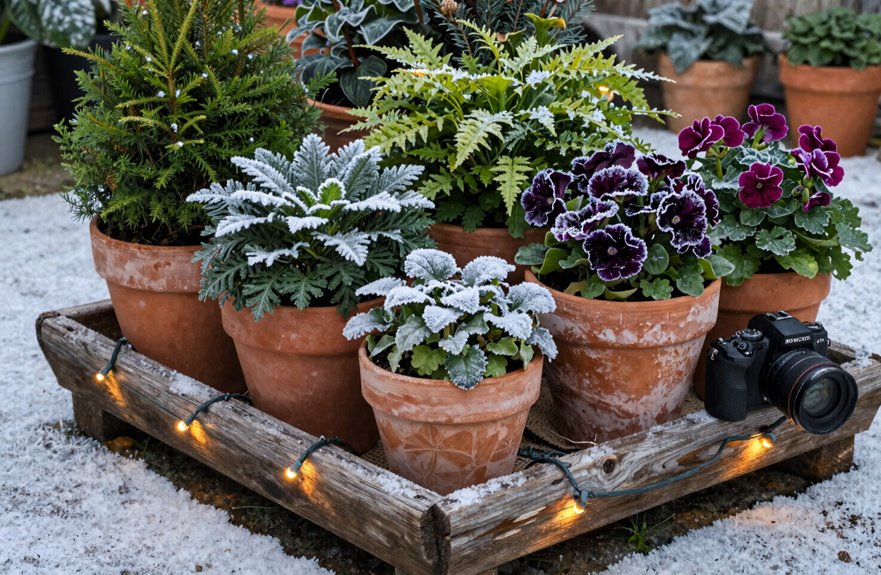
Since cold air can sneak in from every direction, grouping outdoor containers together is one of the simplest ways to help them survive winter. Clustering containers creates a cozy microclimate where plants share warmth and humidity, keeping the temperature around them slightly higher than the surrounding air.
| Placement | Benefit |
|---|---|
| Near a south-facing wall | Captures and reflects heat |
| Under an enclosed porch | Blocks wind, traps warmth |
| Tight cluster formation | Minimizes gaps, shares protection |
I tuck my group into sheltered spots, like against the house or under the eaves, where walls radiate stored warmth and block biting winds. For extra protection, I drape frost-proof cloth or row covers over the cluster. This traps ground heat and shields tender stems. I elevate pots on bricks or stands to stop cold moisture from pooling underneath. Keeping your group compact allows the plants to weather cold snaps more effectively than isolated containers.
Winter-Proof Pots With Bubble Wrap or Burlap
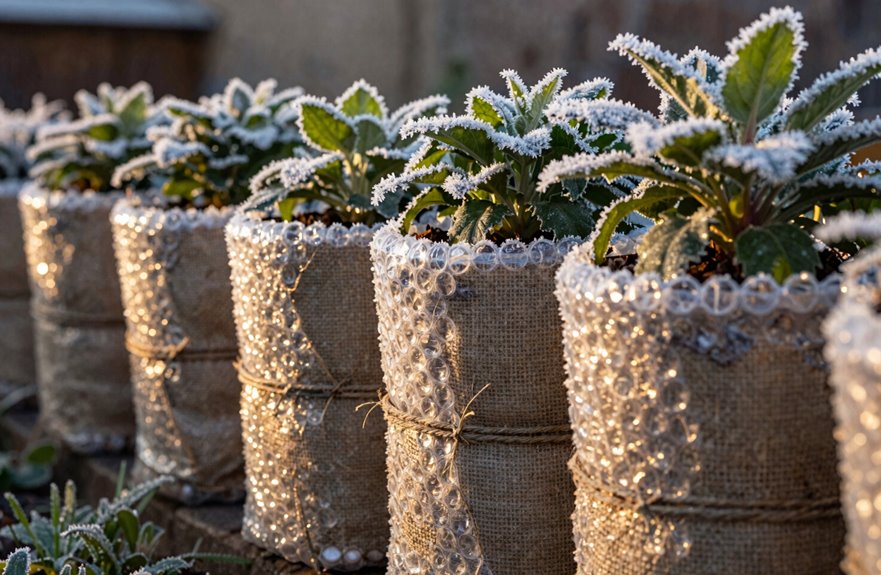
I wrap my outdoor pots with bubble wrap or burlap when temperatures drop. This simple barrier traps heat where roots need it most. Secure two to three layers around each container, leaving drainage holes open, or use breathable burlap for wind protection without the plastic sheen. Either method creates a buffer that keeps soil five to ten degrees warmer than the surrounding air.
Bubble Wrap Insulation
Why let your potted plants freeze when a little bubble wrap can make all the difference. I use bubble wrap insulation every winter, and it keeps my container plants thriving through the coldest months.
- Wrap bubble wrap around pots to trap warmth and shield roots from freezing
- Nest smaller pots inside larger ones with bubble wrap between for double protection
- Secure everything with garden ties or tape so nothing slips in wind
- Maintain soil warmth that keeps roots healthy below 32°F
- Layer with mulch and windbreaks when temperatures really plummet
I start wrapping before the first hard frost, working methodically from my largest containers down. My plants reward this care with vigorous spring growth. This practice prevents root damage from freezing temperatures and extends the growing season for container gardens in cold climates.
Burlap Wrapping Technique
One of my go-to tricks for brutal winters is layering burlap over bubble wrap, a one-two punch that keeps my pots cozy without smothering them.
First, I wrap bubble wrap around the pot with the bubble side facing the container. This traps air and slows heat loss. Next, I add an outer layer of burlap, which lets moisture escape while blocking wind. I secure both layers with twine or zip ties, pulling snug around curves and corners so nothing flaps loose during gusts.
This combo shields my plants when a sudden cold snap hits, keeping soil temperatures steadier than bare pots ever could. When spring arrives, I peel everything off, shake out the burlap, and stash it dry for next year.
Root Zone Protection
That burlap-and-bubble-wrap combo works great for the plant above ground, but the real danger hides underneath. Your roots need protection too.
Here’s how to lock in warmth where it counts:
- Wrap pots with bubble wrap, securing with tape for an insulating jacket
- Nest smaller pots inside larger ones, filling gaps with straw or leaves
- Layer burlap around containers for breathable, moisture-smart defense
- Group potted plants together to build a shared, warmer microclimate
- Check soil moisture weekly. Dry roots freeze faster than damp ones
Root zone protection isn’t complicated. Create barriers that slow heat loss and steady temperature swings. Plants wrapped this way survive winter dormancy intact, and your containers remain viable for the next growing season.
Heat Enclosed Porches to Protect Tender Plants
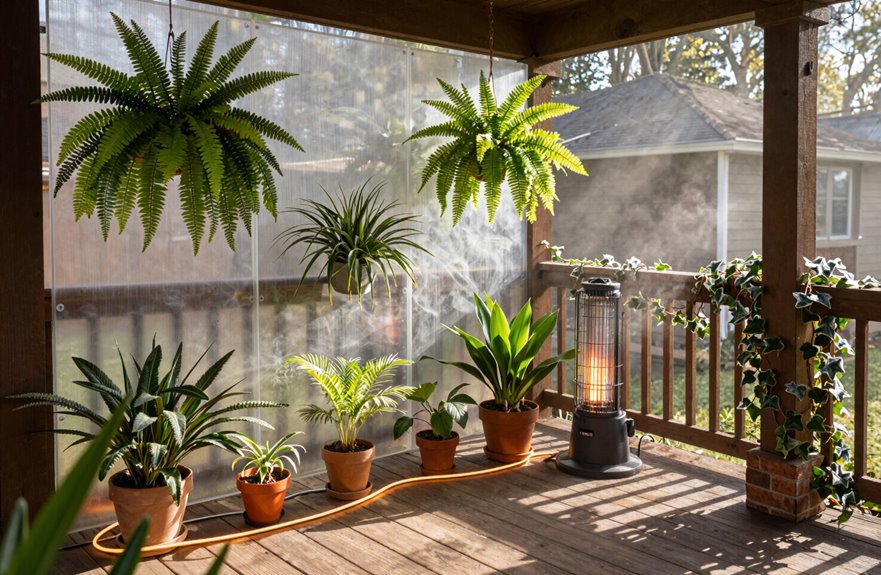
When winter’s cold snaps threaten my tender plants, I’ve found that heating an enclosed porch creates a perfect halfway house between the harsh outdoors and my crowded living room.
My approach to porch heat management follows five steps. First, I seal gaps with plastic sheeting or frost-proof cloth, trapping warmth while leaving small vents to prevent overheating. Second, I position a small space heater nearby, keeping it away from plants and drafts. Third, when nights drop to the low 20s °F, I add individual covers propped with sticks so foliage stays untouched. Fourth, I cluster plants together, creating cozy microclimates that share warmth. Finally, I remove covers once temperatures rise above freezing, letting sunlight fuel growth. This routine keeps tender plants alive through the coldest months.
Mulch Deep Around Roots for Winter Warmth
I insulate my plants’ root zones with a thick layer of mulch before the ground freezes, typically aiming for 3 to 4 inches of shredded bark or straw. This depth traps soil warmth, locks in moisture my plants still need, and creates a buffer against sudden temperature drops that can crack roots. The right coverage depends on your plant spacing and garden size, specific materials like shredded bark and straw retain heat more effectively than others, and proper application requires stopping the mulch a few inches from plant stems to prevent rot.
Root Zone Insulation
Why do so many gardeners lose plants to winter damage when the solution lies right underfoot? Mulch deep around roots before hard frost arrives. Mulch traps heat in the soil, shields roots from freezing, and steadies ground temperature. It works for trees, shrubs, flowers, and vegetables alike.
- Spread mulch two to four inches deep across root zones.
- Keep mulch two inches away from stems and trunks to prevent rot.
- Use shredded bark, straw, or pine needles for best insulation.
- Layer mulch after the first hard frost but before soil freezes solid.
- Extend the mulch ring one to two feet beyond the plant’s drip line.
Pair root protection with covers for top growth. Don’t pile too deep, or roots suffocate. Proper mulching prevents winter damage to plant roots.
Moisture Retention Benefits
Winter moisture escapes when the ground repeatedly freezes and thaws, leaving plants thirsty and vulnerable. Mulch locks in that essential hydration.
Here’s how to apply it effectively:
- Spread 2-4 inches of organic mulch (shredded bark, straw, or compost) around plants’ root zones. This layer acts like a blanket, keeping soil temperatures steady and preventing the freeze-thaw cycle from stealing moisture.
- Ensure mulch covers evenly without touching stems or trunks. Too little wastes the effort; too much risks suffocating roots.
- Combine this with windbreaks and coverings for maximum protection.
Plants stay hydrated through dry winter spells, and roots won’t face both cold and drought simultaneously.
Frost Protection Depth
When temperatures plunge, the depth of your mulch layer makes all the difference between surviving roots and frozen damage. Mulching requires proper technique rather than simply piling material on top of soil.
Getting the depth right involves these key steps:
- Aim for 2-4 inches of organic mulch around trees and shrubs
- Spread straw, wood chips, or shredded leaves evenly to the dripline
- Keep mulch 2-3 inches away from stems and trunks to prevent rot
- Replenish thin spots before hard freezes hit
- Check depth annually since mulch breaks down over time
Too little leaves roots exposed; too much invites trouble. Properly spread mulch creates a stable zone where soil stays warmer even when the air turns bitter. This protective layer significantly increases plant survival rates through winter.
Block Winter Wind With Burlap Windbreaks
How can you protect your plants from biting winter winds without blocking the sun they still need? Burlap windbreaks offer the perfect balance.
Here’s how to set them up:
- Position burlap windbreaks on the windward side of your beds, where cold gusts hit first. This shields susceptible plants from drying winds that steal moisture and warmth.
- Secure the burlap with sturdy stakes or heavy rocks every 3-4 feet. Flapping tears fabric and stresses plants, so check tension carefully. Your barrier should extend 12-18 inches below the soil line and rise slightly above plant height.
- Pair burlap with 2-3 inches of mulch underneath. Together, they trap ground heat and slow nighttime temperature drops.
- On milder days above 45°F, loosen or remove sections to prevent overheating and ensure adequate light reaches your plants.
Water Soil Before a Freeze to Hold Heat
Burlap windbreaks guard your plants from harsh gusts, but soil moisture is equally important for winter protection. Watering soil before a freeze helps it hold heat, since moist soil stores more thermal energy than dry soil. That moisture transfers warmth back to roots during cold nights, cutting down on damage risk.
Moist soil stores more thermal energy than dry soil, transferring warmth back to roots when temperatures plunge.
- Water 24 hours before the freeze hits, giving soil time to absorb
- Aim for damp, not soggy, about 1 inch of water per square foot
- Check drainage first; standing water rots roots fast
- Pair this with 2-3 inches of mulch for extra insulation
- Skip watering if rain’s coming, since nature’s got it covered
This step keeps your plants’ root systems functional when temperatures plunge.
Cover Plants With Frost Cloth at Night
Nighttime temperatures can sneak up and catch your plants off guard. A frost cloth gives them a fighting chance. I drape breathable frost cloth over my tender plants before sunset, never plastic, which traps moisture and causes rot. The cloth shields foliage from cold air and holds precious ground heat close to where roots need it.
| Task | Purpose |
|---|---|
| Choose breathable frost cloth | Allows air flow, prevents condensation damage |
| Drape before sunset | Traps residual soil warmth effectively |
| Insulate ground edges | Seals gaps where heat escapes |
| Remove by mid-morning | Prevents overheating when sun returns |
| Pair with deck enclosure | Adds 10-15°F protection in extreme cold |
I pull the frost cloth off once temperatures climb above 32°F. On my porch, I’ve tucked containers inside a plastic enclosure with a small heater when mercury drops to the low 20s. This setup ensures plant survival through winter.
Prop Frost Cloth Above Foliage and Stems
A frost cloth works best when it doesn’t hug your plants too tight. I prop mine above stems and foliage using bamboo stakes or sturdy sticks, so it’s not touching leaves. This traps ground heat and stops cold transfer to tender growth.
- I choose frost-proof cloth rated for my climate, never plastic, so plants breathe and stay safe.
- I drive stakes six inches from the base, creating a tent that holds an insulating air pocket.
- I drape the cloth over these supports, covering the plant completely without weighing down branches.
- I secure the edges firmly to the soil to lock in warmth and block wind.
- I spread two inches of mulch around the roots first, pairing it with the cloth for extra temperature stability.
Remove Winter Covers Once Morning Thaws Arrive
Once temperatures climb above freezing the next morning, I pull off my winter covers without delay. Leaving them on traps heat, and my plants cook under there like leftovers in a sealed container.
Here’s my routine:
- I check the forecast first. If daytime highs hit 35°F or above, I strip off every frost cloth, cloche, and row cover before 10 a.m.
- I inspect what I uncover. Wet leaves mean trouble; mold follows moisture fast. I pat soil surfaces with my finger, and a dry top inch gets a light drink.
- I fold covers dry and stack them flat in my shed. They’re ready when mercury plunges again.
- I stay alert. Warm snaps fool us both. When cold returns, I’m back out there re-covering by sunset.
Build a Cold Frame for Winter Seedlings
The cold frame is my favorite tool for keeping winter seedlings alive without hauling everything indoors. I build mine with a simple wooden box and a hinged lid, or you can grab a kit if you’re short on time. I position it facing south or southeast to catch every ray of sun, and I seal the edges tight to trap that precious heat.
My cold frame work process includes:
- I tuck straw, leaves, or bubble wrap around the edges for extra insulation
- I set the frame directly on soil so ground warmth rises up
- I vent the lid on mild days so plants don’t cook
- I prop the cover open when temperatures climb
- I check morning and night to keep conditions steady
This approach keeps seedlings viable through winter until spring planting arrives.
Install Mini Greenhouses for Tender Perennials
Why let your tender perennials freeze when a mini greenhouse costs less than replacing them each spring? Mini greenhouse protection keeps delicate plants thriving through harsh months.
Here’s how to build one:
- Bend cattle panels into arches or buy small prefab frames; both work great.
- Stretch clear plastic or greenhouse film over the frame, securing every edge to trap heat.
- Place tender perennials inside, where soil stays warmer and moisture holds steady.
- On sunny days above 50°F, open the ends or peel back covers to prevent overheating.
This setup extends your growing season and carries plants through sudden cold snaps. With mini greenhouse protection, your tender perennials survive winter instead of requiring replacement each spring.
Rescue Cold-Damaged Plants With Pruning
When winter’s cold has taken its toll, here’s how to bring your plants back with careful pruning.
- First, prune away only dead or severely damaged wood so your plant can push out fresh, healthy growth and avoid disease.
- Grab clean, sharp shears and cut back to healthy tissue, stopping just above a pair of healthy buds or lateral branches.
- Remove damaged branches at or near their point of origin to keep the plant’s structure strong and reduce stress on the plant.
- Don’t prune into wood that looks alive if you’re unsure; wait for a warming spell, then reassess to avoid cutting too much.
- Carry all removed material well away from your healthy garden beds to stop pathogens from spreading to other plants.
Reduce Winter Watering as Plants Go Dormant
I’ll walk you through how I cut back on watering once my plants settle into their winter sleep. First, I scale back to soaking the soil just once every 2-3 weeks instead of my usual weekly routine, since dormant roots barely drink and soggy ground invites deadly rot. I still run my drip line for about 20 minutes before a hard freeze though. Damp soil holds warmth like a blanket, keeping roots 3-5 degrees warmer than bone-dry dirt. You’ll want to water early, around 8 or 9 a.m., so leaves dry by sundown and don’t turn into icy traps after dark.
Winter Dormancy Basics
Although your outdoor plants might look like they’re sleeping through the cold months, they’re actually entering a rest period called dormancy. This means they need far less water than you might think. I cut back my watering sharply once outdoor temperatures drop and growth slows. This temperature regulation helps plants rest without added stress.
- I water far less often to prevent serious root rot in dormant roots.
- I let the top inch of soil fully dry between drinks to stop fungus.
- I keep soil barely damp, never soggy, in both garden pots and ground beds.
- I water early in the morning so leaves dry before evening cold arrives.
- I switch to lighter, infrequent sprinklings since dormant plants sip water more slowly.
Soil Moisture Management
Managing soil moisture puts dormancy knowledge into practice. Water less since dormant plants require minimal hydration. Moist, not soggy, soil holds warmth better around roots. Time watering before frost hits to boost that protection, then mulch to retain moisture.
Here’s how I judge my watering routine:
| Condition | Action |
|---|---|
| Shallow soil feels dry | Water lightly |
| Frost predicted tonight | Water in morning |
| After watering | Add 2-3 inches mulch |
Check moisture near the surface weekly, adjusting for cloudy days or sudden cold snaps. Different plants need different care. Succulents prefer drier soil than shrubs. Learning this rhythm requires consistent observation and adjustment based on your specific plants’ needs.
Root Rot Prevention
As temperatures drop and your plants settle into dormancy, you’re walking a tightrope with winter watering. Too much moisture turns cold soil into a breeding ground for root rot.
- I let the top inch of soil dry between drinks since root rot prevention starts with keeping dormant roots out of cold, soggy muck.
- I water before a freeze only if the ground isn’t frozen because damp earth holds heat but wet earth chills deeper.
- I spread two inches of mulch over the root zone to buffer swings and steady winter moisture.
- I check three inches with my finger before adding water and wait if it feels damp.
- I lift pots onto feet or bricks so excess moisture drains fast and roots stay airy.





