
I picture a vertical garden as any system that grows plants upward instead of outward. You’ll use trellises, wall-mounted panels, or repurposed items like ladders and pallets to lift crops off the ground. These setups work indoors or outside, in soil or hydroponically, and typically need at least six feet of height for proper airflow. Your tomatoes, cucumbers, and beans climb the structure while you harvest standing at eye level. The goal is simple: fit more plants into less space while keeping everything accessible and healthy. I can show you exactly how to build one that matches your space and budget.
What Is a Vertical Garden, Exactly?
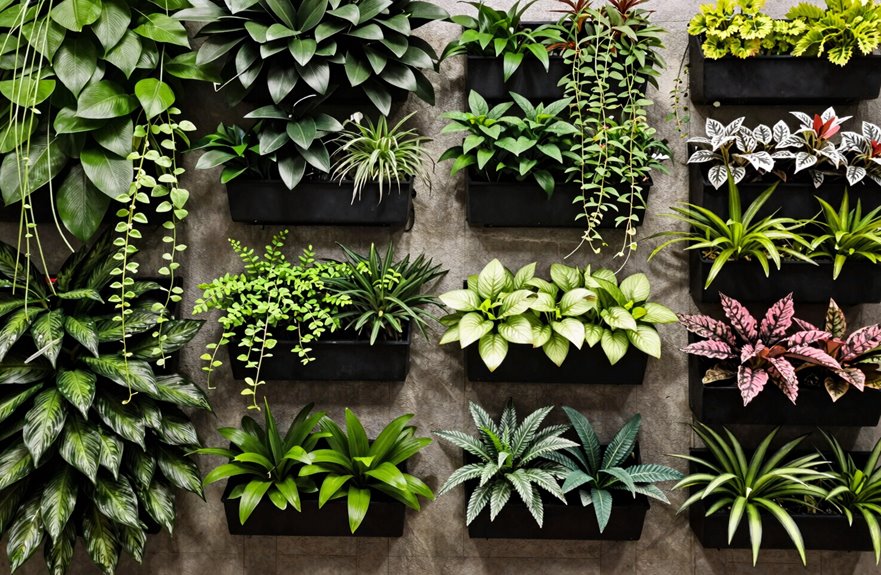
So, what exactly is a vertical garden? It’s how I grow plants upward instead of outward, using structures like a trellis, arch, or wall to claim space I never knew I had.
Vertical gardening lets me transform bare fences, ladders, or even repurposed containers into living systems. I can install these gardens in-ground or in containers, and some folks use hydroponics to feed plants without soil. Whether I buy a premade kit or build my own, the goal stays the same: space efficiency.
This practice includes living walls, green walls, and plant walls, indoors or outdoors. I get improved airflow around my plants, easier harvesting at eye level, and better plant health. It’s practical, approachable, and it works for my space.
Why Vertical Gardening Beats Ground Growing
Why do I grow my vegetables upward instead of letting them sprawl across the ground? Vertical gardening works better for me and my patch. First, I train tomatoes, cucumbers, and beans on six foot wooden trellises, which keeps leaves dry and cuts disease by letting air move freely around each plant. Second, I don’t break my back; the ripe fruit hangs right at eye level, so I pick without bending or kneeling. Third, this space saving trick packs more plants into every single square foot because vines climb instead of spread. My summer squash gets full sun from top to bottom, and I harvest double the crops from the same footprint. Growing vertically produces measurably better results than ground sprawl.
The Space-Saving Math of Vertical Gardening
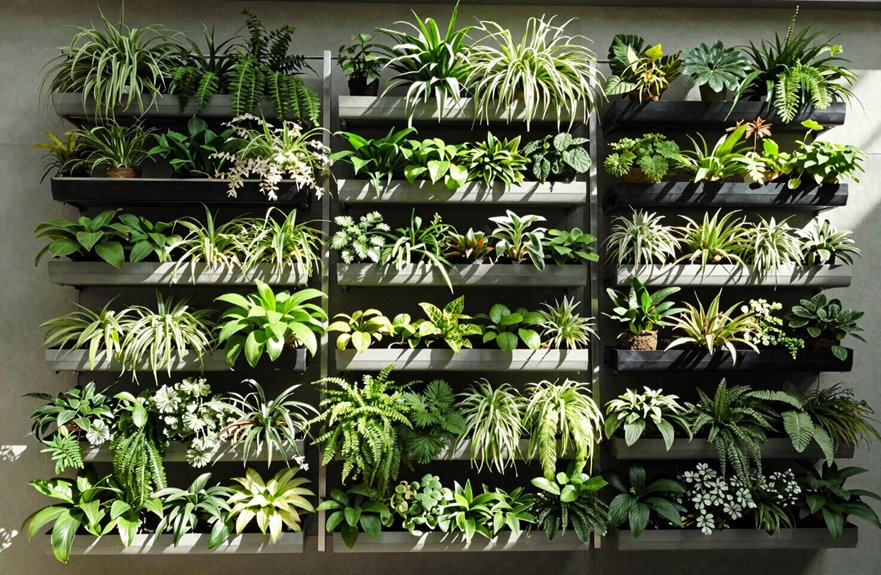
If you think my garden is small, you’re right. I still pull twice the harvest from the same patch because I stack my plants upward instead of letting them roam. This is the space-saving approach of vertical gardening.
One squash plant sprawls across 20 square feet on the ground. Train it up a trellis, and I’ve freed several square feet for lettuce and herbs underneath. Same area, more food.
I follow three steps. First, I choose sturdy trellis materials; cattle panels or wire mesh work great. Second, I place trellises north-to-south so every plant catches sun. Third, I anchor bases deep, about 12 inches, so heavy vines don’t topple anything.
Vertical gardening requires no tricks. It’s simply growing smarter in the space available.
Healthier Plants, Bigger Harvests: How Going Vertical Delivers Both
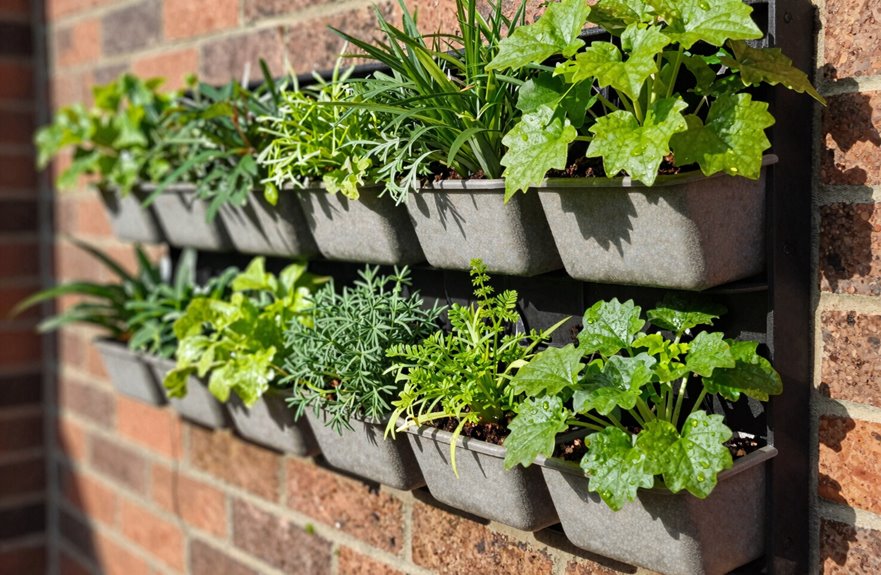
How do I get my plants to thrive with less work? Vertical gardening does exactly that. By raising crops on trellises or arches, I’m not just being space-smart. I’m creating conditions where plants genuinely flourish.
When I grow upward, several changes occur:
- Improved airflow keeps leaves drier and cleaner, slashing disease problems before they start
- Upright growth stops soil splashback, so bacteria and fungi stay away from stems and fruit
- Harvesting efficiency jumps dramatically when I pick at eye level instead of bending down
This space-saving approach means I fit more plants in the same footprint, yet each one performs better. My back doesn’t ache, my harvests grow bigger, and my plants stay healthier season after season. Vertical growing delivers measurable benefits across productivity, plant health, and physical comfort.
Which Crops Thrive on Trellises (and Which Don’t)
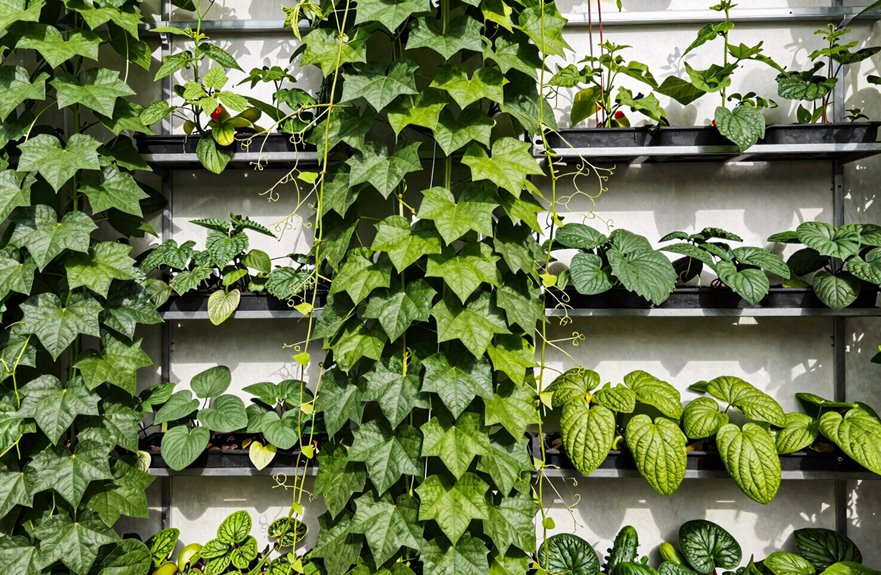
What crops work best when I send them climbing? Pole beans, tomatoes, cucumbers, sugar snap peas, and fava beans thrive on trellises. Vining squash like zucchini and butternut squash also perform well if you train them early. Luffa gourds, climbing herbs, and flowers such as mint, thyme, nasturtium, and lemon verbena do well in vertical gardening setups.
Not everything belongs up high, though. Deep-rooted plants need mounds or special setups before they’ll cooperate with climbing crops. Avoid forcing bushy, heavy plants onto supports meant for leaner vines.
The most effective method involves three steps: plant, tie gently, and prune regularly. This keeps airflow strong and prevents tangling. Strong airflow and proper pruning directly lead to healthier plants and better yields.
The 3 Best Trellis Types for Home Gardeners
Why settle for flat gardens when you can grow upward? Three trellis types will transform your space into something productive and visually appealing.
- Arch trellises span two raised beds to create an airy walkway. You’ll reach hanging fruit and climbing vegetables easily during harvest, and this tunnel structure supports crops along every inch.
- Obelisk trellises stand like teepees in the center of square beds. They’re perfect for lighter climbers such as peas, fava beans, pole beans, smaller tomatoes, herbs, and flowering vines.
- Panel or Gardenary style arches upgrade basic setups into stunning focal points. You boost space efficiency and garden beauty without wasting a single square foot.
Pick one style that fits your beds and start growing skyward.
How to Install Trellises That Won’t Collapse
I want to walk you through exactly how I keep my trellises standing strong all season long. First, I always pick metal or iron over flimsy options, since wind and heavy vines will snap weak materials in no time. Then I press the base a full 12 inches into the soil, and I angle the whole thing north-to-south so every plant gets its fair share of sun.
Select Sturdy Materials
The right trellis can make or break your vertical garden, so let’s pick materials that’ll stand strong all season. I start by choosing trellises that reach at least six feet, since tomatoes, cucumbers, and pole beans need room to climb without tangling. For sturdy materials, I prefer metal or iron frames because they resist wind and heavy fruit loads better than flimsy plastic. If I’m using wood, I make sure it’s solid and paired with reliable anchoring.
What to look for:
- Six feet of height or more for busy vines
- Metal or iron construction that won’t bend in storms
- Thick wooden posts if I skip metal, since they need extra support
When you select sturdy materials, your trellises remain upright throughout the season and your plants grow reliably.
Anchor Deeply Underground
Once you’ve picked strong materials, you’ll need to lock them in place so they don’t lean or topple over. Trellis anchoring requires serious depth. Press each wooden leg at least twelve inches into firm soil. Deep anchoring provides your vertical garden real stability, even when vines get heavy and winds pick up.
First, drive the base straight down until a full foot disappears underground. Second, pack dirt tightly around each post so nothing wiggles. Third, step back and give the frame a solid shake to test its strength.
If it budges, push it deeper. Your tomatoes, cucumbers, and pole beans need a secure home that won’t collapse under summer growth. Taking extra time to anchor well now prevents structural failure later.
Position for Sunlight
Where you put your trellis matters just as much as how deep you anchor it, so let’s map this out carefully. I position my trellis to run north to south when possible. This balances sunlight across the whole structure, so every plant gets its share.
Key placement guidelines:
- Pick a sunlit spot with easy access for tending and harvesting your vertical gardening setup
- Press the base 12 inches deep into soil to stop tipping as plants grow heavier
- Use taller trellises, at least six feet, for tomatoes, cucumbers, and pole beans
I anchor wooden trellises securely, but I prefer metal or iron for stronger wind and weight resistance. Good sunlight and solid positioning keep your trellis stable and support healthy, productive growth all season long.
Harvest Without the Back Pain
I used to dread harvest days because I’d spend hours on my knees, but vertical gardening changed everything for me. Now I pick tomatoes and beans at chest height while standing straight, which cuts my back strain by half and lets me work twice as long without pain. My trellised peas grow on the north side of my beds, my cucumbers climb the arch at the center, and I never miss ripe fruit anymore because I can see every plant distinctly at eye level.
Standing Harvest Benefits
Most gardeners feel the ache after a morning of bending and kneeling in the dirt, but vertical growing changes the whole routine. I keep my crops elevated on trellises, so I pick everything at eye level. This upright placement means I don’t crawl searching for hidden zucchini or peas.
Vertical harvest accessibility transforms my daily routine. I spot ripe fruit, and I don’t miss produce buried under dense leaves. When I organize by crop type, peas on one trellis and zucchini on another, I move through faster.
- Eye-level picking lets me grab fruits at peak ripeness without guessing.
- Elevated plants stay cleaner since trained trellises maintain airflow and support.
- Organized rows cut my picking time in half on busy mornings.
Vertical growing makes gardens accessible to people of all physical abilities.
Reduced Body Strain
Why does my back thank me after every harvest? Vertical gardening brings everything to me, so I don’t crouch or kneel in dirt anymore. My trellis systems hold plants upright, and I pick while standing straight.
| Task | Ground Garden | My Vertical Setup |
|---|---|---|
| Picking position | Bend to 18 inches | Stand at eye level |
| Reaching | Deep into 24-inch foliage | Direct to stem |
| Time per plant | 5-7 minutes searching | 2-3 minutes spotting |
I train vines weekly, tying them upward. This keeps fruit visible and reachable. I don’t twist or stretch into awkward angles anymore. My knees stay straight, my spine stays aligned. Reduced body strain means I harvest longer without that familiar ache setting in. I check for damaged produce quickly too; clear sightlines show me everything.
Easier Fruit Access
How much faster is harvest day when every tomato and bean hangs at eye level? I used to crawl through dirt, searching for hidden zucchini. Now I walk my vertical rows and pluck fruit while standing straight.
Training cucumbers and peas on trellises transforms accessibility. Instead of kneeling, I reach. Instead of guessing, I see. Each ripe crop waits at arm’s length, and nothing rots forgotten beneath leaves.
When you grow upward:
- I spot ripeness immediately. No more missed fruit hiding in shadows.
- I pick twice as fast because trellises keep everything organized and visible.
- I finish harvest without once touching my knees to the ground.
This is gardening that respects your body. Welcome to the group that grows smart.
Why Airflow Keeps Vertical Plants Disease-Free
One of the biggest headaches I used to face in my garden was watching my tomatoes and cucumbers develop fuzzy gray mold or yellowing leaf spots apparently overnight. Then I discovered vertical gardening changes everything. By training vines up a trellis, I lift leaves above ground. This creates airflow drying morning dew within an hour, not six.
Upright growth stops splashback from hitting lower leaves, so bacteria cannot reach them. Open spacing lets me prune for a 6-inch gap between stems, and wind circulates through every branch. Drier foliage means fungi cannot take hold, and harvest stays heavy. If you want healthy plants, give room to breathe upward. Good airflow prevents disease.
Build Your Vertical Garden for Under $50
You don’t need a big budget to grow up instead of out. I’ve built my own vertical gardening setups for under $50, and you can too. Start with a basic trellis or panel, and gradually upgrade to arches or obelisks as your garden grows.
Grow up, not out—vertical gardening on a budget is easier than you think.
- First, use repurposed materials like welded wire, T-posts, cattle panels, or chicken wire to keep your budget low.
- Next, try DIY bamboo canes with netting or simple frames for functional support without a big upfront cost.
- Then, pick premade plant cages, stackable planters, shelving, wall pockets, or arches that fit a tight budget.
Search online tutorials for plans that help you optimize costs and assembly. With smart choices, your DIY vertical gardening project stays affordable, productive, and easy to manage.
Where to Place Vertical Gardens: Sunlight, Walls, and Small Spaces
First, face trellises north to south so every row gets equal sun and one side isn’t left in shade all morning. Next, mount lightweight panels on fences, patios, or interior walls using brackets that won’t bend under twenty pounds of wet soil; leave a four-inch gap for air and drainage. Finally, group sun-loving herbs on the top tiers and shade-tolerant greens below so no plant struggles because it can’t shift out of a neighbor’s shadow.
Optimal Sunlight Placement
Strategically positioning your vertical garden can make the difference between sparse harvests and thriving plants. Vertical gardening success starts with understanding sunlight exposure for your climbing crops.
- Place your setup where tomatoes, cucumbers, and beans get full sun to light shade. Strong light fuels their growth.
- Orient trellises north-south so both sides receive balanced light. This prevents uneven growth and keeps your garden looking full.
- Choose spots with at least 6 feet of height for airflow and easy harvesting.
In small spaces, tuck systems against sunny walls or fences to capture every ray. For indoor growing, use a grow light with a timer. Leafy greens and vines need consistent photoperiods to flourish.
Wall-Mounted Solutions
How can I expand my growing space without taking up more ground. I turn to wall-mounted vertical gardens.
First, I scan my home. I see balcony exteriors, living room walls, even narrow hallways. These surfaces become my growing canvas. I install panels, trellises, or simple arches, whatever fits my space and budget.
Second, I plan for sunlight. I position my trellises running north-south when possible. This balance gives my plants even light and keeps shadows off neighboring beds.
Third, I build sturdy. I anchor supports with solid brackets and drill holes for drainage. Wind and weight grow heavy as my climbing plants mature: beans, tomatoes, cucumbers, peas.
Finally, I train my vines upward. I tie stems gently and check weekly. My wall-mounted system produces harvests that exceed what my small space could otherwise accommodate.
Pruning and Training Climbing Plants Weekly
Why let your climbing plants waste energy on growth that won’t feed you? In vertical gardening, I guide my climbers upward so every inch of precious sun counts. Each week, I check my trellis and start pruning. I gently train vines upward with soft ties, keeping airflow strong between leaves.
- I cut yellowing lower leaves on tomatoes and peas to push light and energy toward fruit production.
- I snip damaged leaves near the base so the plant focuses on healthy growth and fruit development, not repair.
- I remove late-season pea offshoots that won’t have time to fruit, and I trim leafy tomato stems while keeping some suckers for balance.
This weekly rhythm keeps our vertical garden productive and manageable.
What to Plant First in Your New Vertical Garden
I’ll walk you through a simple three-step order for planting your new vertical garden. Start with easy-to-grow beginner vegetables like pole beans and cucumbers at the base of a sturdy six-foot trellis in full sun. Next, add companion herbs and flowers, such as contained mint and nasturtium, for color and fragrance. Finally, tuck quick-harvest salad greens into open pockets so you can start picking fresh leaves within four weeks instead of waiting all season.
Easy-to-Grow Beginner Vegetables
Starting your vertical garden with the right crop lineup makes all the difference between early frustration and quick wins. Beginner vegetables thrive when matched to smart vertical gardening techniques from day one.
- Train pole beans, cherry tomatoes, cucumbers, sugar snap peas, and vining squash up trellises at least six feet tall for sturdy, tangle-free growth
- Plant peas or beans on the near edge so you can reach them easily, and let that airflow keep vines healthy
- Guide cucumber and tomato vines along horizontal or vertical lines to lift fruit off the ground and simplify your harvest
Tuck lettuce, spinach, or mint into nearby pockets while your climbers mature. You will maximize every inch, enjoy continuous yields, and develop skills as part of a vertical gardening community.
Companion Herbs and Flowers
Once my pole beans, sugar snap peas, fava beans, and small tomatoes are climbing their six-foot trellises, I’m ready to tuck in companion herbs and flowers. Vertical gardening works best when I layer plants with purpose.
I start with compact, sturdy herbs. Mint goes in a contained pot; it spreads fast. Nasturtium adds edible blooms that trail beautifully. Then I add climbing varieties: twining thyme, Malabar spinach, and lemon verbena. These maximize my vertical space and fill the air with fragrance.
For flowering climbers, I choose passionflower and lantana where my climate allows. They bring color and attract bees and butterflies to pollinate my vegetables.
I match light needs carefully. Tomatoes and mint love full sun, while nasturtium handles partial shade. This pairing keeps every plant thriving on my vertical setup.
Quick-Harvest Salad Greens
The first plants I put in any new vertical garden are the ones that give me something to eat fast. When you’re starting out with vertical gardening, salad greens deliver results in just 30-45 days. I stick shallow-rooted arugula, spinach, and baby kale at my trellis edges where they’ll catch good air and light.
Here’s how I set myself up for success:
- Mix high-quality potting soil with perlite for drainage and root growth
- Group greens by water needs so irrigation stays simple
- Pick compact varieties like baby lettuce and mesclun that won’t weigh down your structure
I water until I see drainage, then let the growing medium dry slightly between sessions. This rhythm keeps my salad greens happy without overcomplicating things. With consistent watering and proper drainage, vertical salad greens will thrive.
Indoor Living Walls vs. Outdoor Trellis Setups
Where exactly should you begin when choosing between an indoor living wall and an outdoor trellis? Consider where you’ll actually spend time with your plants.
Indoor living walls transform blank walls into living tapestries using modular panels, irrigation systems, and soil or soil-free mediums. You’ll need grow lights and possibly fertigation. They reclaim dead space in apartments or offices.
Outdoor trellis systems use wire, wood, or metal frameworks to guide climbers upward. They free ground space for vegetables or herbs below, and sunlight does the heavy lifting.
Quick guide:
- Measure your space—walls versus open areas.
- Check light availability—natural sun or artificial fixtures.
- Consider access—indoor walls need more technical setup, while trellis systems offer simpler maintenance.
Both options allow growers to maximize every inch of available space.





